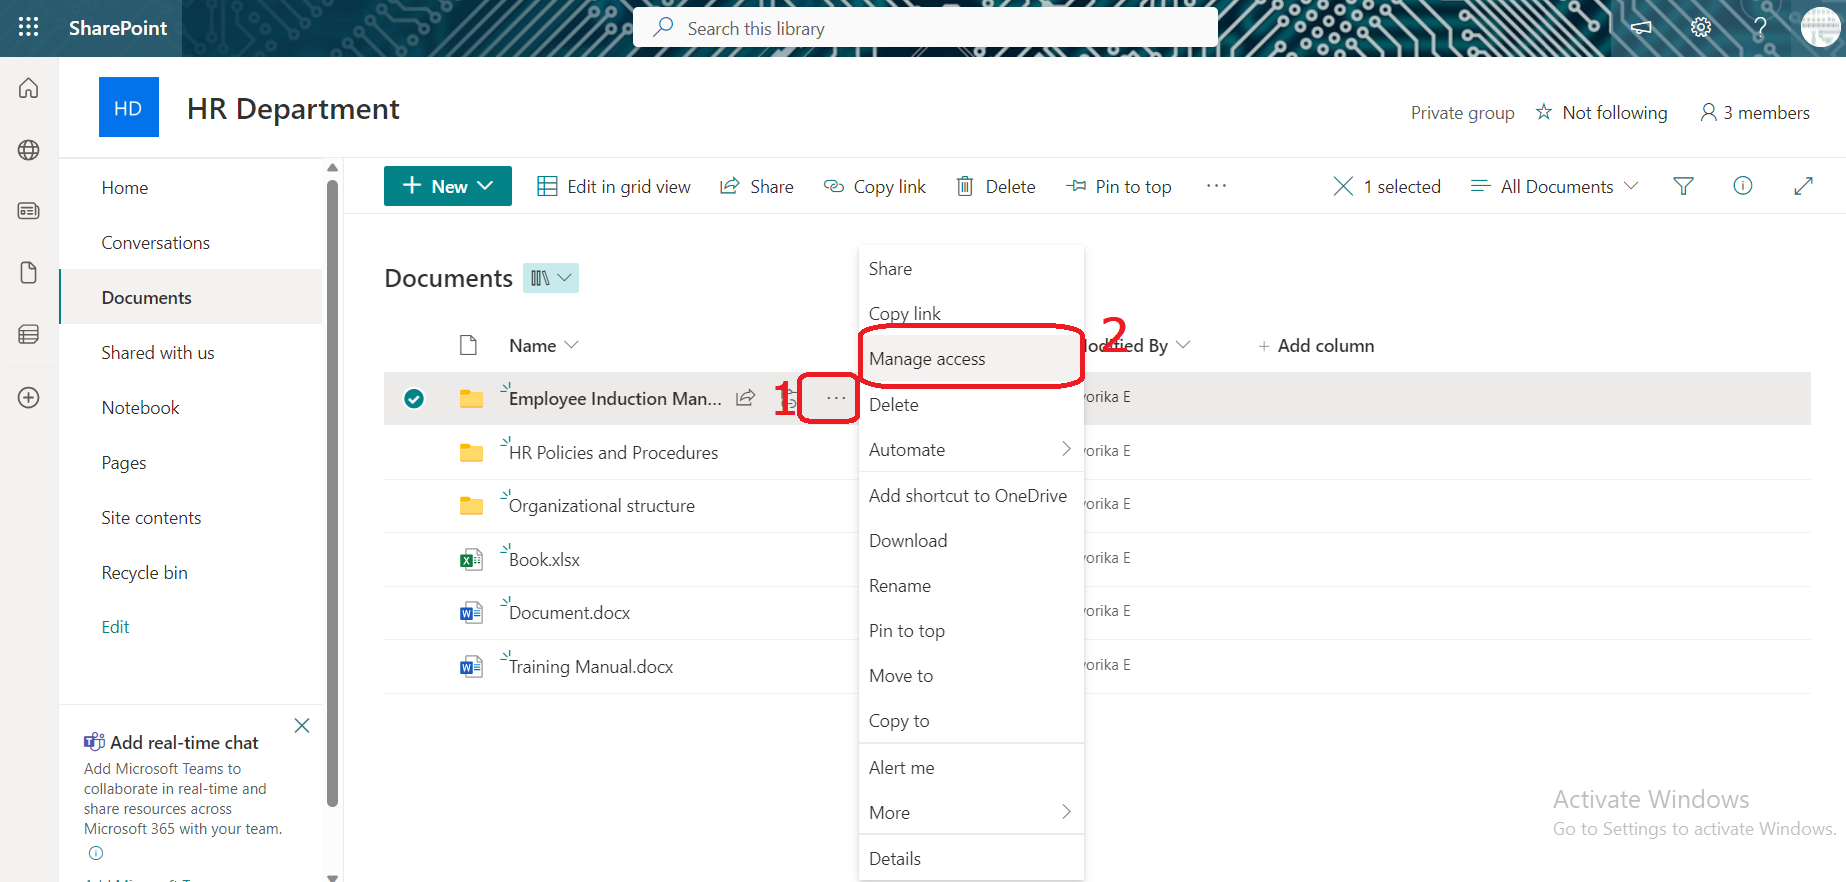
How to Manage Permissions in SharePoint
SharePoint, a dynamic collaboration tool crafted by Microsoft, empowers teams to seamlessly collaborate on documents, projects, and information. However, with great collaboration power comes the need for effective permission management to ensure data security and controlled access. In this piece, I'll take you through the steps of granting and removing permissions in SharePoint. This will assist you in managing the fine line between sharing your content and ensuring its protection.
Understanding SharePoint Permissions
SharePoint permissions govern the individuals with the authority to access, modify, and distribute content across your site, document library, or list. It's essential to grasp a few fundamental concepts:
· Permission Levels: SharePoint offers predefined permission levels such as Full Control, Edit, Contribute, and Read. These levels define what actions users can perform.
· Groups: Groups simplify permission management by allowing you to assign permissions to a set of users instead of individuals.
· Inheritance: By default, permissions are inherited from parent sites or libraries. You can also break this inheritance to establish unique permissions.
Step-by-Step Guide: How to Grant and Remove Permissions
1. Granting Permission
Step 1: Navigate to the Document Library
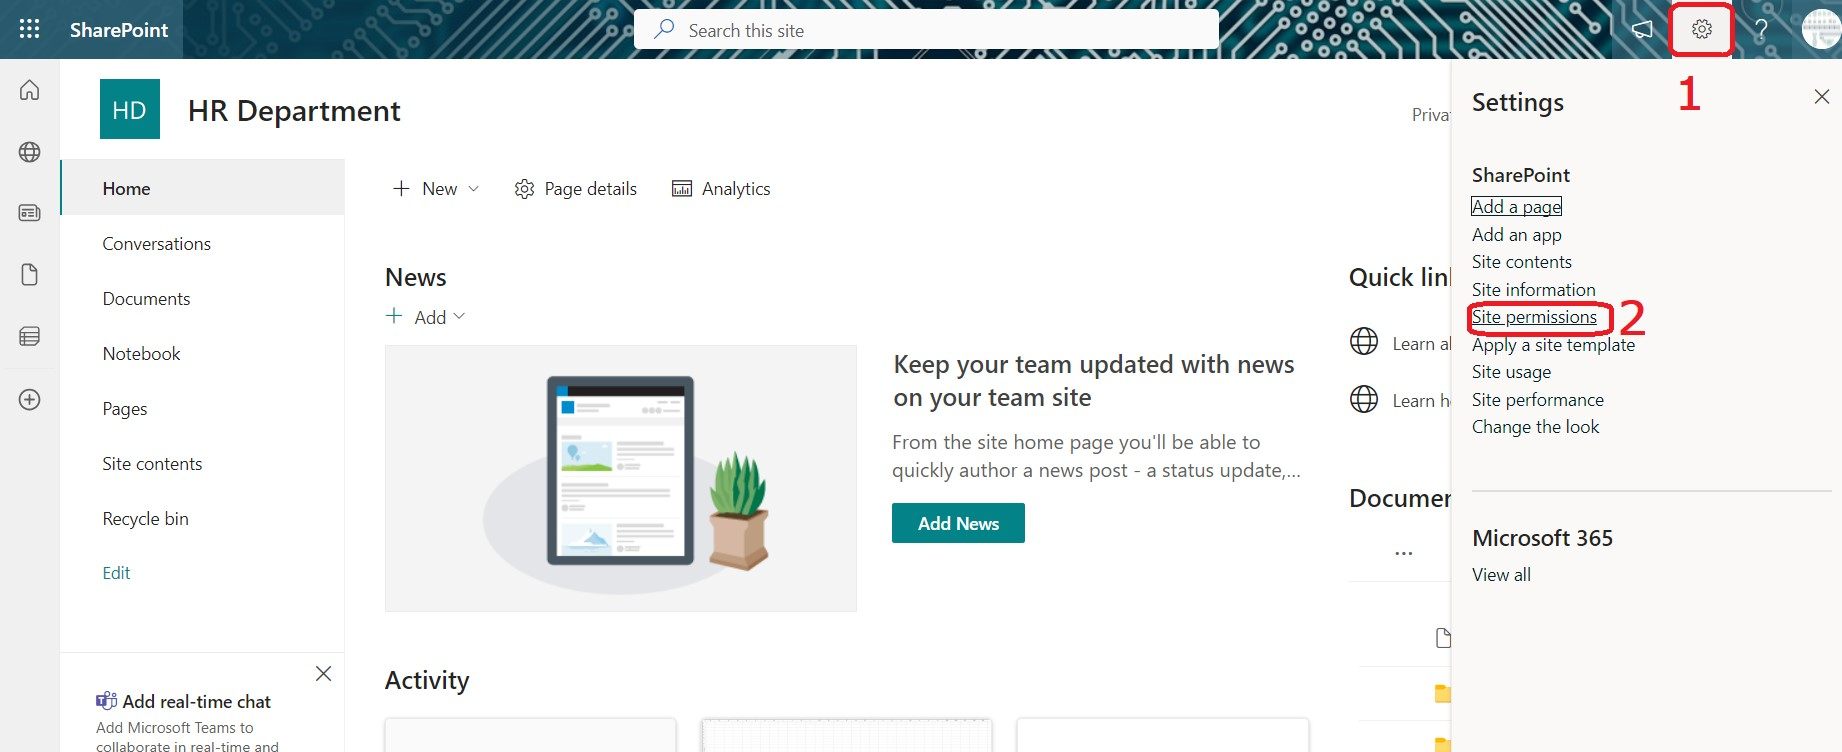
1. Log in to your SharePoint site using your credentials. Navigate to the desired document library or folder where you plan to manage permissions. To do so, Click on the settings icon situated in the upper right corner.
2. From the resulting dropdown menu, select "Site Contents."
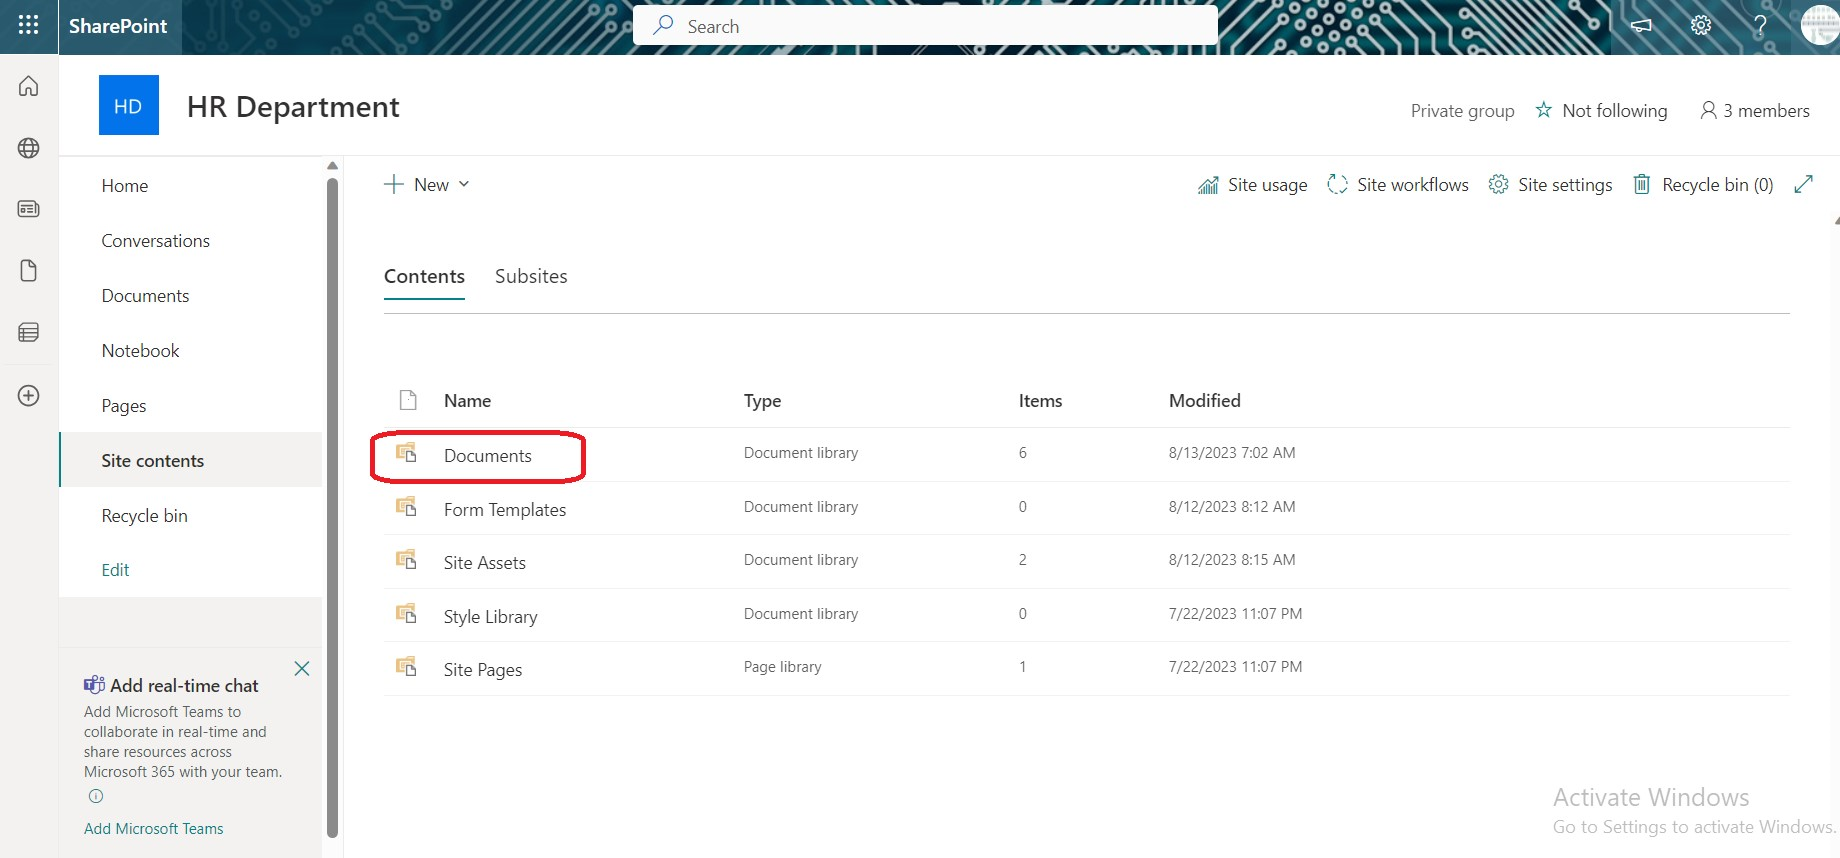
3. Within the Site Contents view, locate and select the "Documents" option, which will smoothly guide you to the designated document library.
Step 2: Access Site Permissions
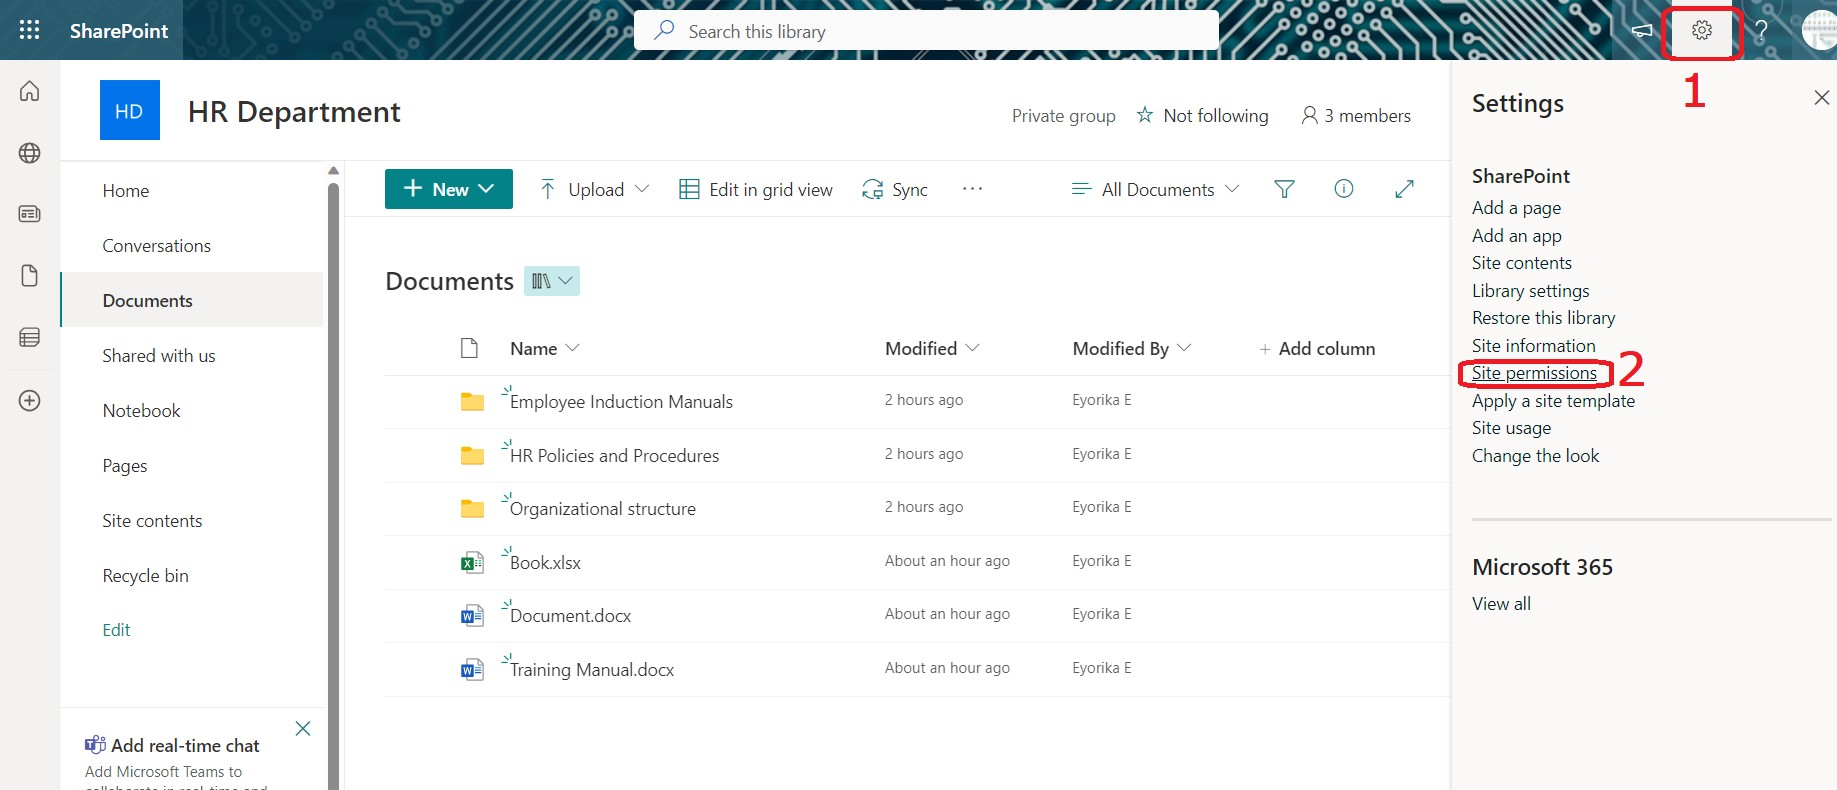
1. Click on the "Settings" (gear) icon.
2. Select "Site permissions".
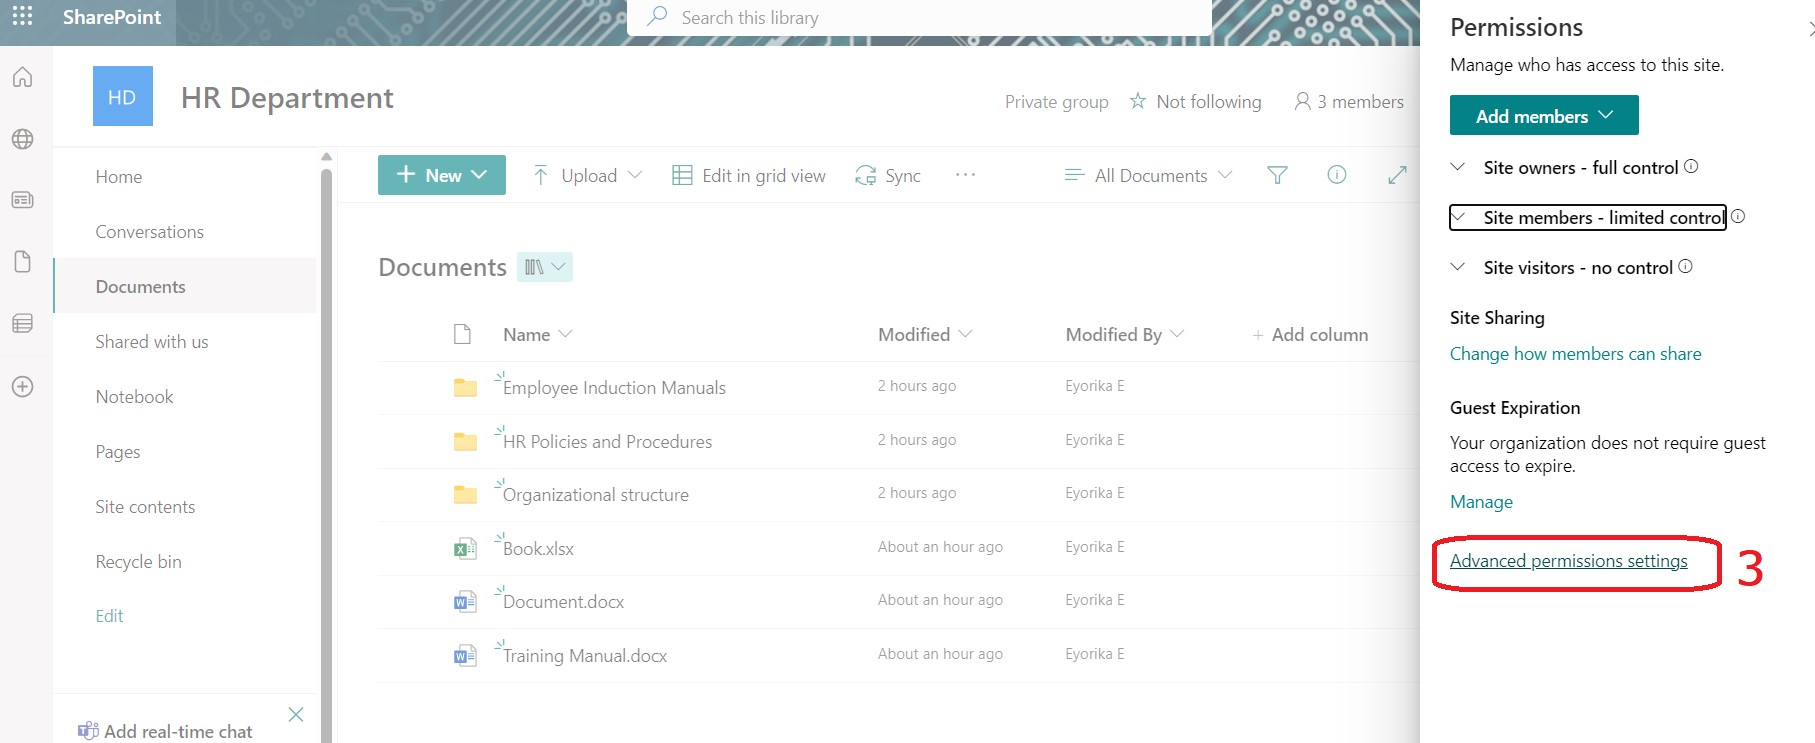
1. 3. Subsequently, you will be directed to the "Permissions" menu. Proceed to click on "Advanced permission settings," which will seamlessly lead you to the Permissions Page.
Step 3: Invite Users or groups and grant appropriate Permission Level
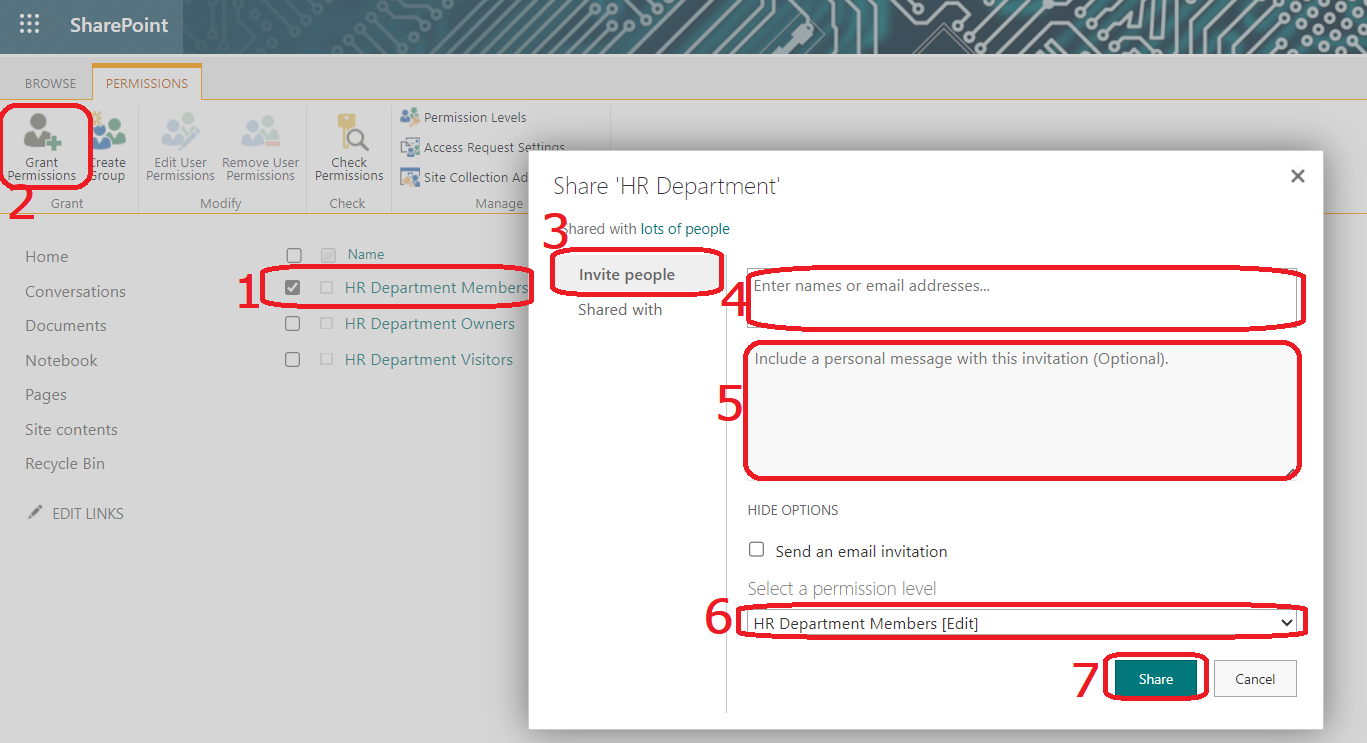
1. Upon reaching the Permissions Page, you will encounter three distinct groups: Owners, Members, and Visitors, each assigned with different permission levels. Now, select the specific group to which you intend to add Users or groups to.
2. Locate and click on "Grant Permission" within the permission ribbon located at the left corner.
3. A popup window will emerge. Click on "Invite People."
4. Enter the email addresses of users or groups you want to grant access to.
5. Provide context by adding an optional message.
6. Assign an appropriate permission level (e.g., Edit, Contribute, Read) to each user or group.
7. Finalize the process by clicking "Share," effectively granting access to the chosen users or groups.
1. Removing Permissions
1. Access the permissions page using the previously outlined method. Select the particular user or group that you intend to remove.
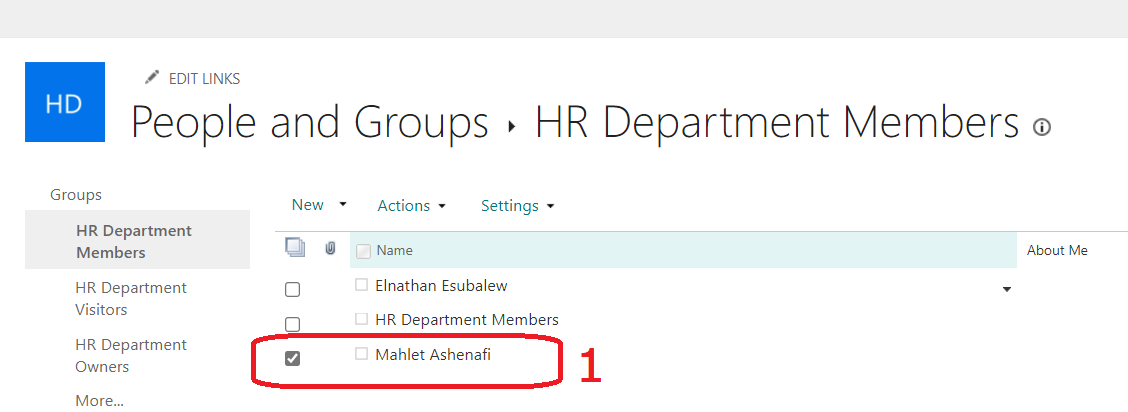
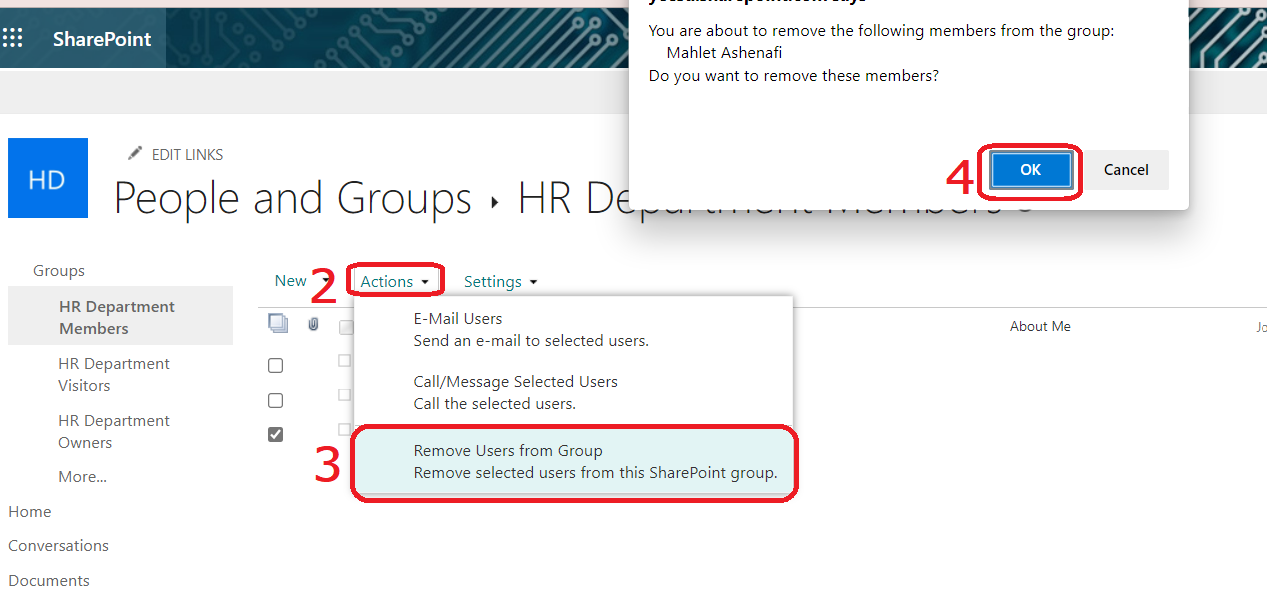
1. 2. Click on the “Actions” menu.
3. From the resulting dropdown menu, choose the "Remove Users from Group" option.
4. A popup window will appear, prompting you to confirm the removal of these members. To finalize the process, affirm the permission of removal by clicking the "OK" button.
Conclusion
Managing permissions in SharePoint ensures that your organization's content is shared securely and efficiently. By following this step-by-step guide, you can confidently control access to documents and folders within your SharePoint environment.
Comments (0)
Categories
Recent posts


Ethiopia University Exit Exam: What You ...
27 Jun 2023
Grade 12 Exam Preparation Ethiopia | ...
18 Mar 2025
How to Make Money Online in Ethiopia | ...
18 Mar 2025


