Managing Unique Permissions
By default, SharePoint employs inheritance for permissions, transferring access settings from higher-level entities (such as sites or libraries) to lower-level components (folders, files, etc.). This ensures uniform access. Yet, unique permissions become crucial for indispensable in various scenarios, including situations involving sensitive or confidential data that require specific authorization, collaborating with external clients while maintaining content privacy, different departments within an organization may collaborate on a single SharePoint site, necessitating distinct access rights to sections that pertain only to each department, and more. Now that we understand the scenarios where unique permissions are essential, let's dive into the step-by-step guide on how to manage them effectively within the SharePoint environment.
Steps for Managing Unique Permissions
Step 1: Navigate to the
Document Library
1.
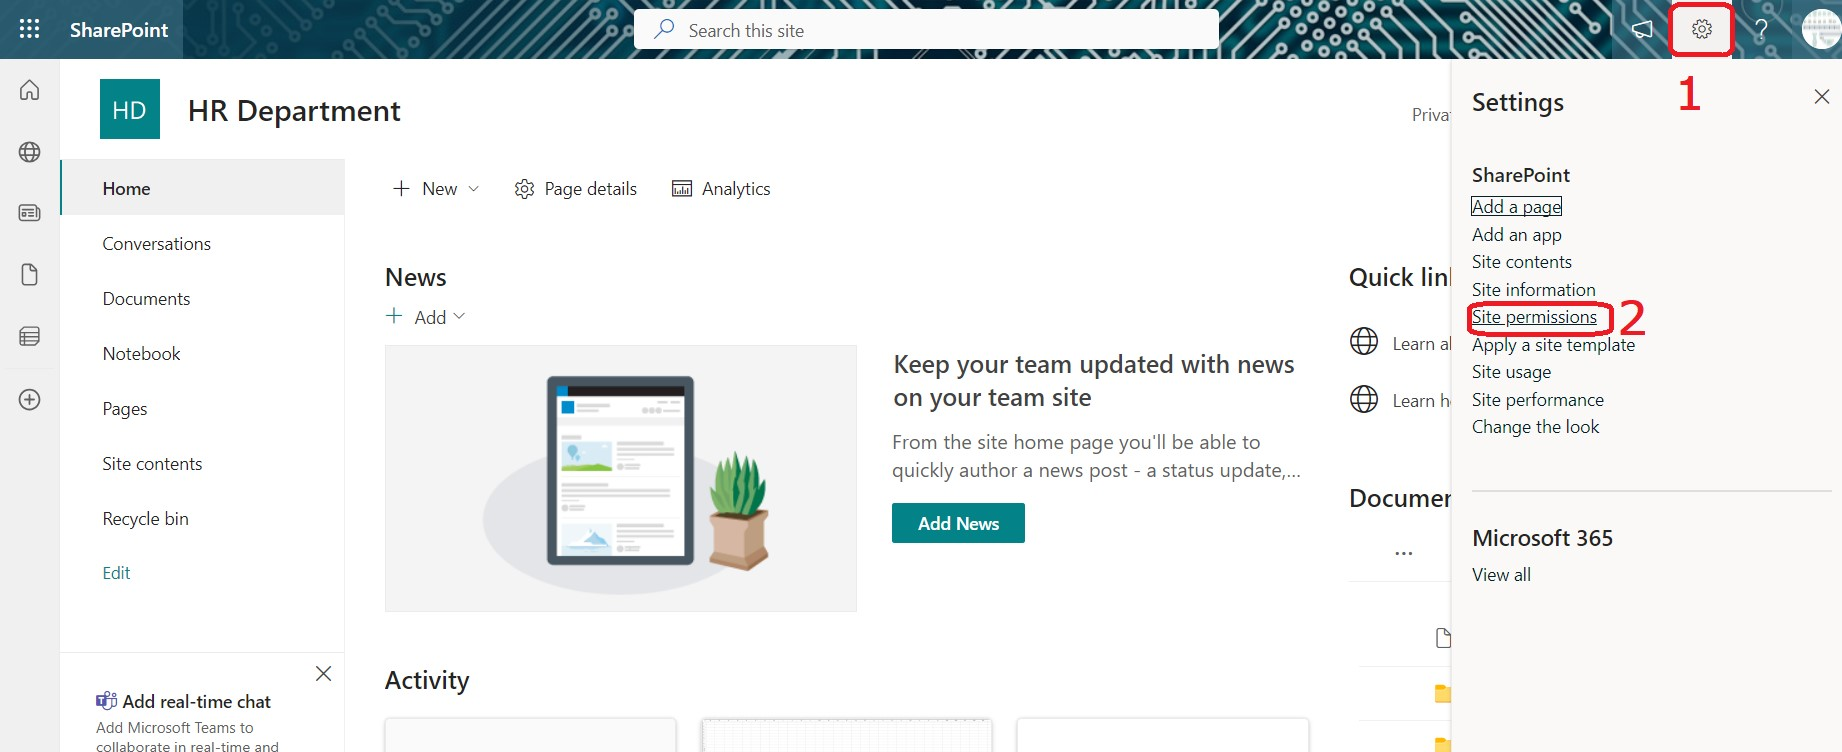
Log in to your SharePoint Site and navigate to the document library
where you want to manage unique permissions. To do so, click on the settings
icon situated in the upper right corner.
2.
From the resulting dropdown menu, select "Site
Contents."
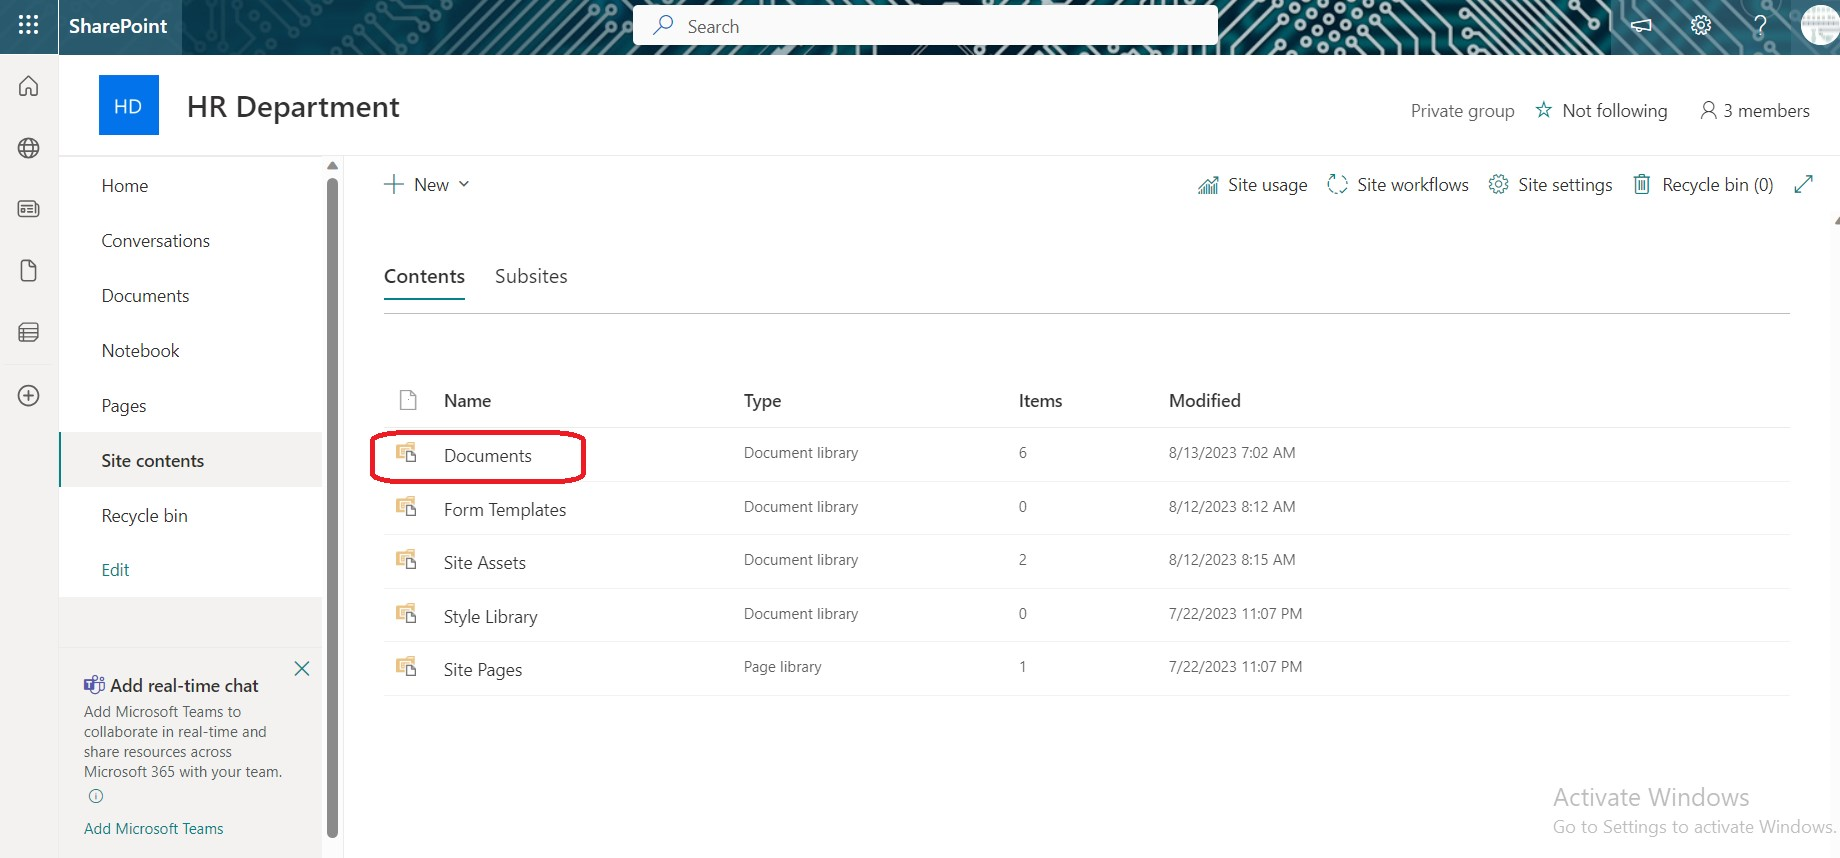
3. Within the Site Contents view, locate and select the
"Documents" option, which will smoothly guide you to the designated
document library.
Step 2: Choose the folder
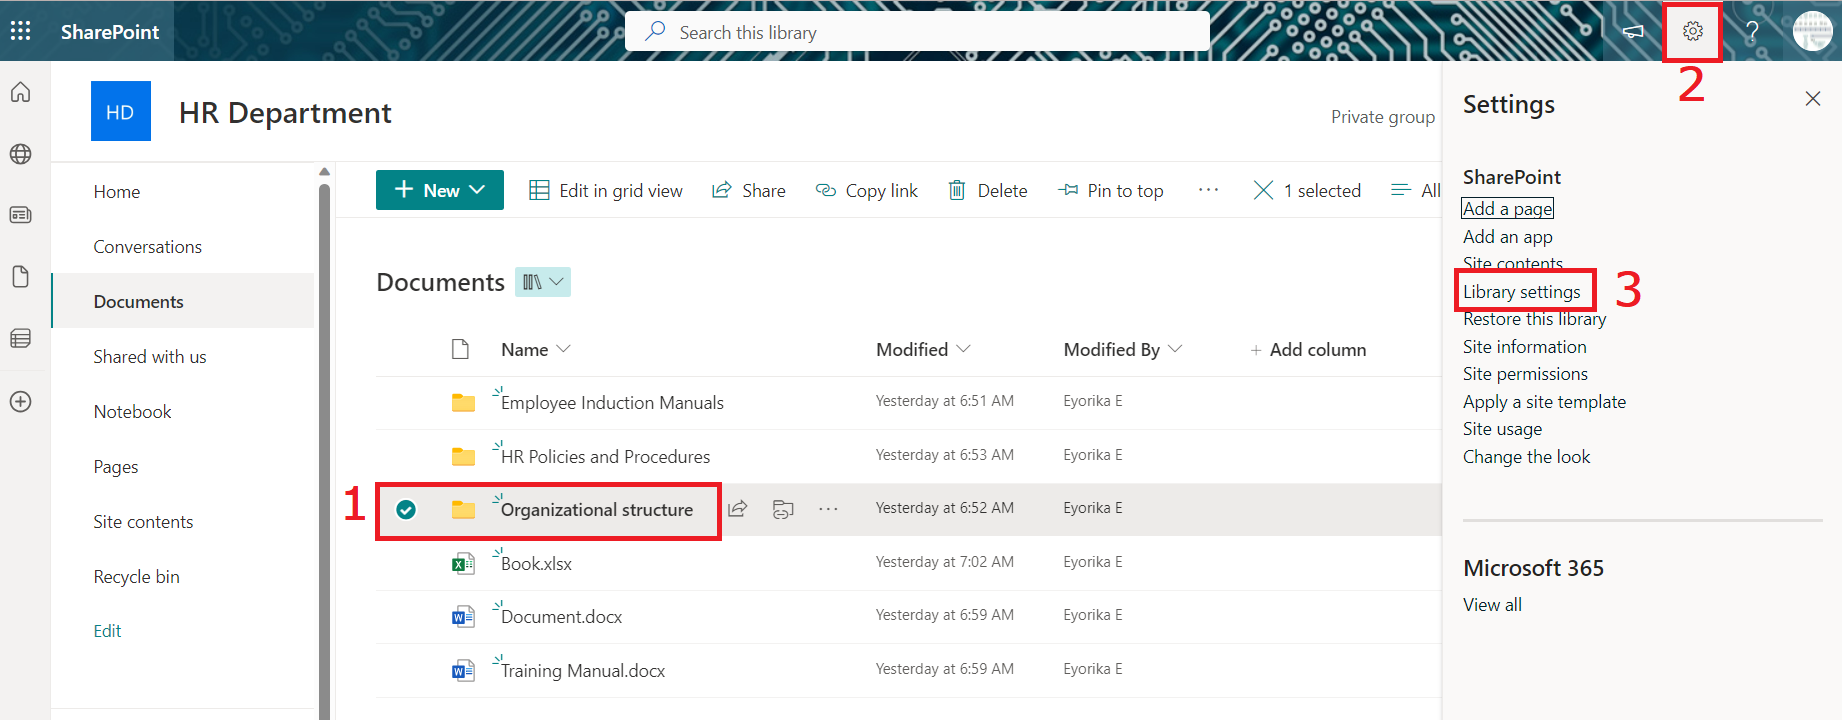
or file and Access Library
1. Click
on the check box of the specific entity (folder or file) for which you wish to
set unique permissions.
2. Click
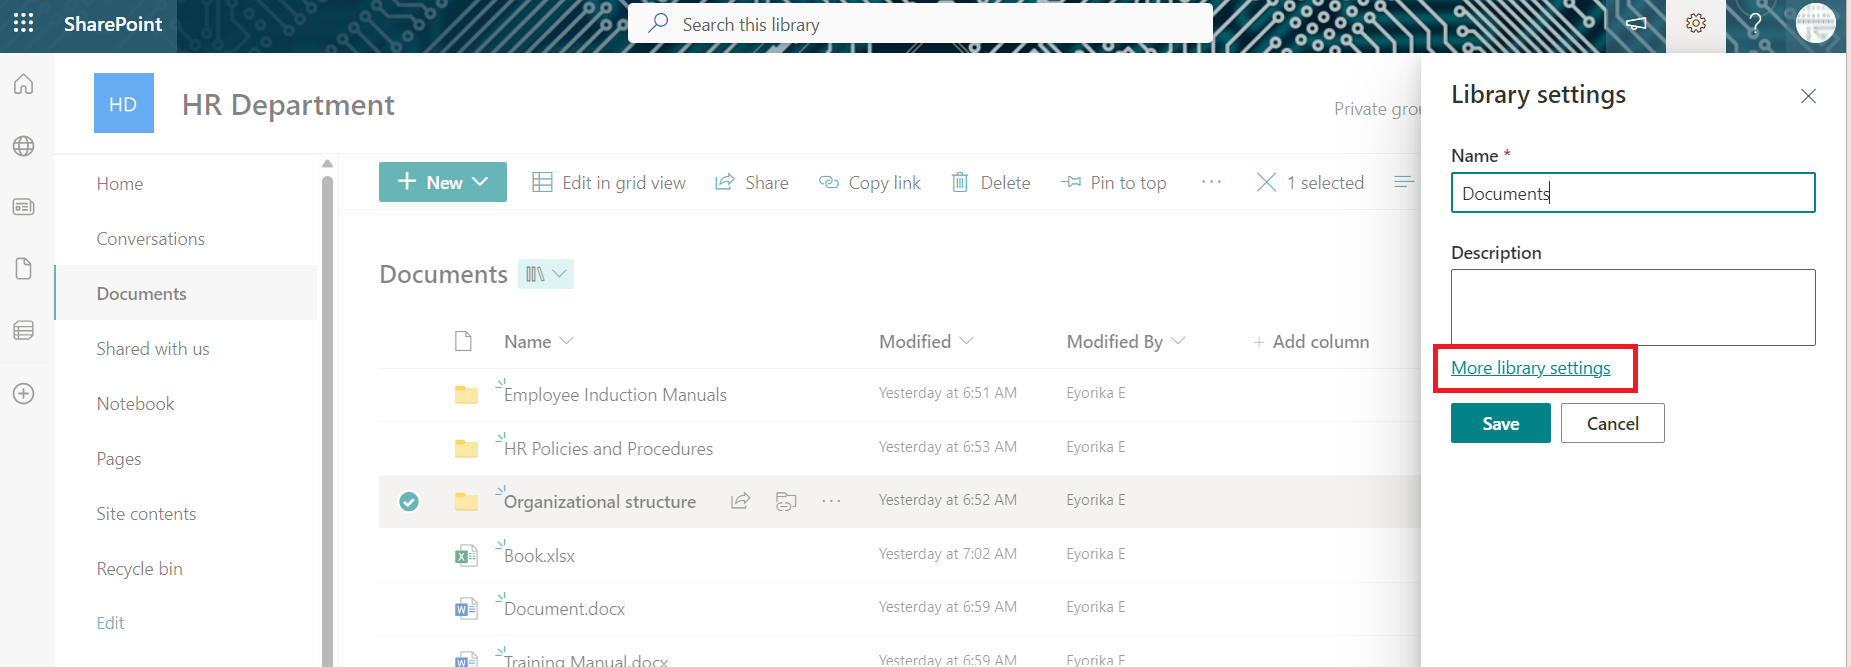
on the gear icon in the top-right corner to access the settings menu.
3. Choose
“Library Settings".
Library Settings
Afterward, A Library settings panel will appear; from there, choose "More Library Settings."
Under
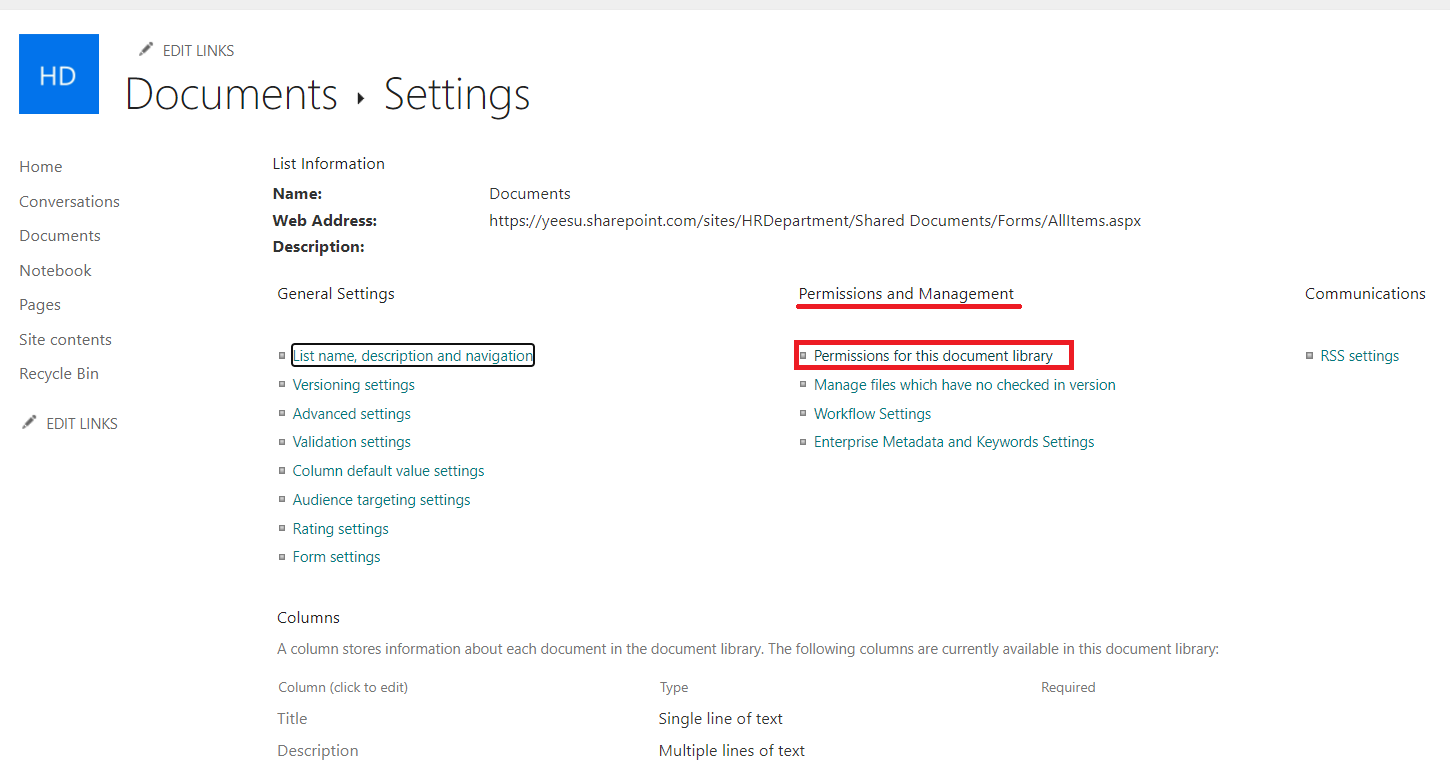
the "Permissions and Management" section, click on "Permissions
for this document library".
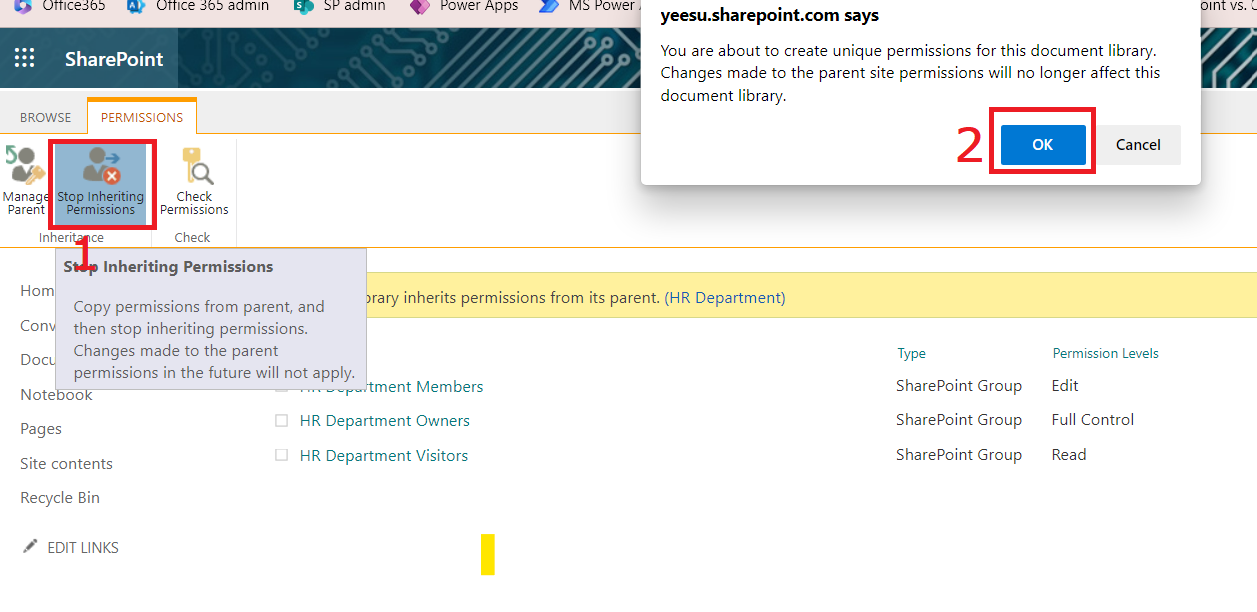
Step 5: Break Inheritance
1. On the permission page, in the top right ribbon, click on "Stop Inheriting
Permissions" to create unique permissions.
2. A pop-up
screen will appear, explaining the action you're about to take (creating unique
permissions). Click "OK" to proceed.

Step 6: Assign Unique
Permissions
1. Once
inheritance is stopped, you can now add users or groups and specify their permissions
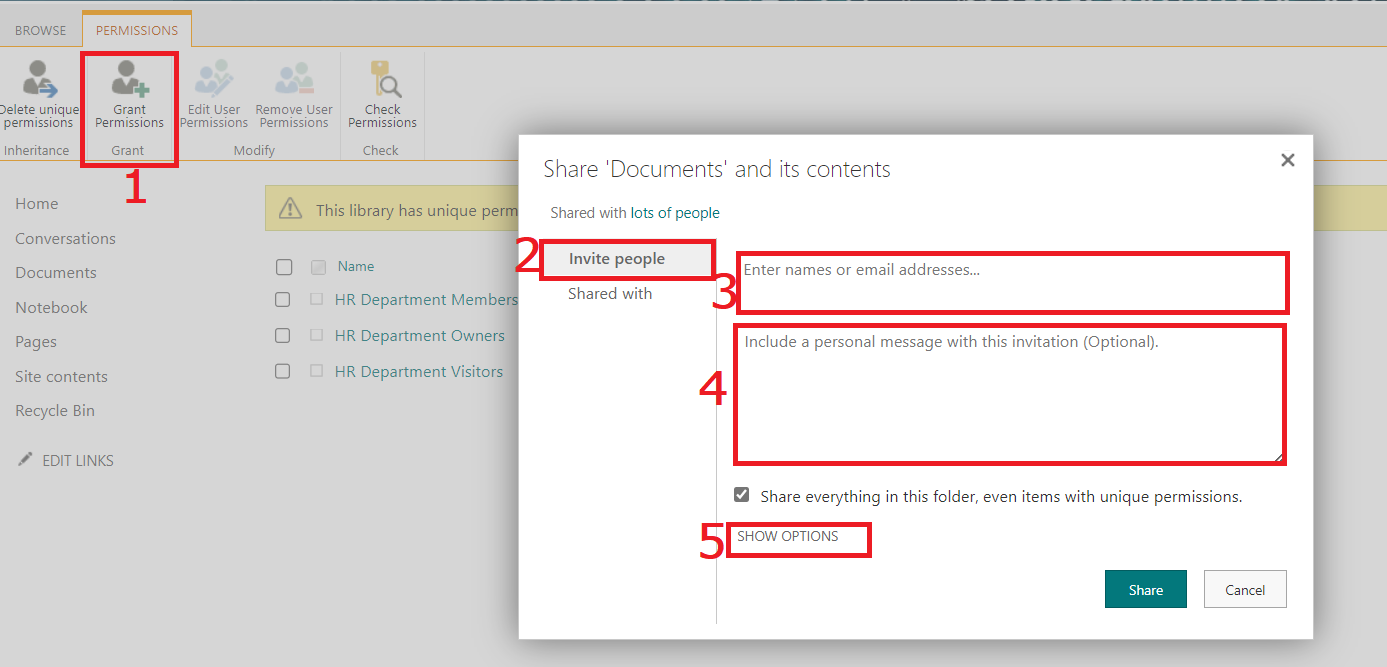
for the selected file or folder. To do so, click "Grant Permissions,"
in the top right ribbon.
2. A popup window will emerge. Click on "Invite People."
3. Enter
the email addresses of users or groups you want to grant access to.
4. Provide
context by adding an optional message.
5. Click
on “Show Options”.
6. Assign
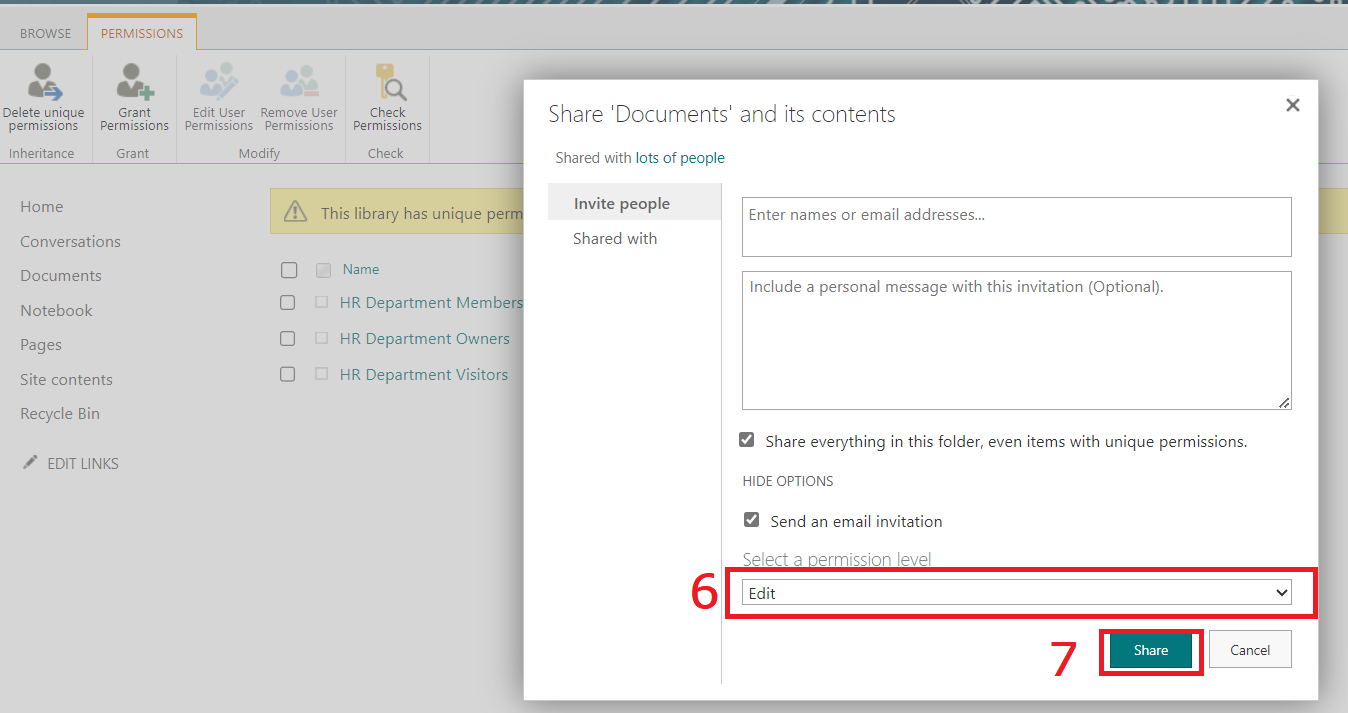
an appropriate permission level (Read, Contribute, Full Control, etc.) to each
user or group.
7. Finalize
the process by clicking "Share," effectively granting unique access
to the chosen users or groups.
Step 7: Verify Permissions
Once added, the new
users/groups will appear in the list. Make sure to review and verify the
assigned permissions.
In conclusion, learning
how to handle unique permissions in SharePoint lets you customize who can
access what. While SharePoint usually inherit access, our examples show where
special rules are needed. If you follow the guide, you can use this power well,
helping your organization keep things safe and private while working together
smoothly in SharePoint.
Comments (0)
Categories
Recent posts


Ethiopia University Exit Exam: What You ...
27 Jun 2023
Grade 12 Exam Preparation Ethiopia | ...
18 Mar 2025
How to Make Money Online in Ethiopia | ...
18 Mar 2025


